السنسور ممتاز وحجمه صغير ويمكن اعادة معايرته وفقا لقراءة جهاز القياس بالدم
Great experience and full control and monitor of the glucose levels
You have %itemCount% in your cart.Total being %total%
Note:
For individualized guidance and assistance, consult your healthcare provider regularly about your glucose monitoring and sensor usage.
Avoid calibrating within the first six hours after installing the sensor or during periods of rapidly changing glucose levels. Always wait until your glucose readings have stabilized before performing calibration.
Calibration is typically unnecessary since the sensor is factory-calibrated. However, if you observe a notable difference between your sensor readings and those from a blood glucose meter, you may perform a calibration. Limit calibration to once per day and only when your glucose levels are stable.
If the difference exceeds 20 mg/dL for readings under 80 mg/dL or 20% for readings over 80 mg/dL, use the calibration option in the LinX app. Contact customer support if you need further help.
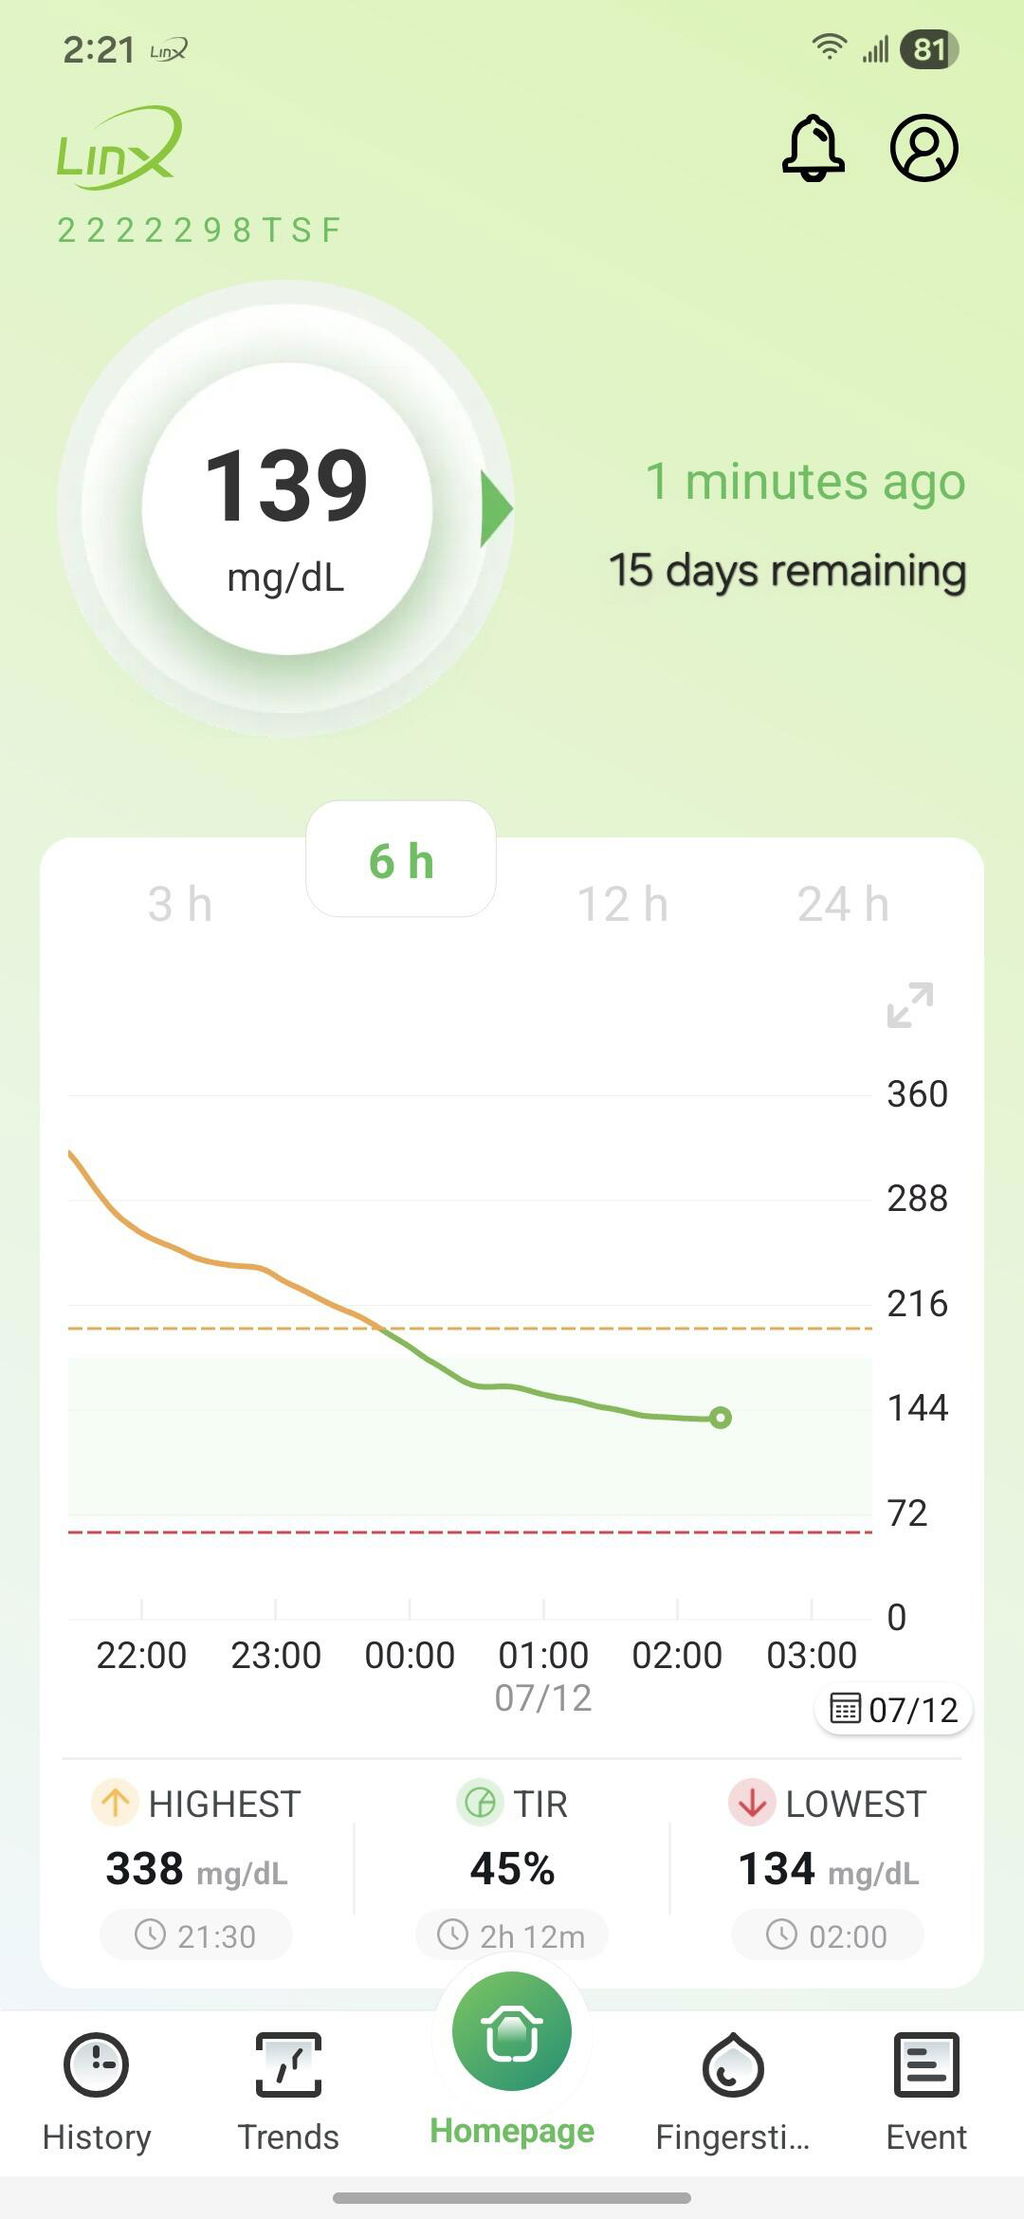
Calibration aligns the sensor readings with your blood glucose meter and appears as a red dot on the trend graph. Recording only logs your blood glucose value without affecting the sensor readings and is shown as a green dot.
CGM sensors track glucose levels in the interstitial fluid beneath the skin, whereas blood glucose meters measure glucose directly from the blood. This delay, called lag time, can result in minor differences between the two readings.
You can calibrate the sensor yourself using the LinX app. However, if you’re unfamiliar with the process or new to LinX, it’s recommended to contact customer support for step-by-step assistance.
United Arab Emirates: Sheikh Rashid Bin Saeed Al Maktoum Street, Executive Office – C1-904, Ajman FZ
Egypt: 4th Floor, The 47 Office Building, Street 90 North, New Cairo 1, Cairo Governorate 11835, Egypt.
Egypt: 1st Floor, Corner of Building No. 37G – Al Mazadat Ring Road, Third District, Ismailia, Egypt.
Previous Administrative Address: 23B, Al Marawa, Sheikh Zayed, Ismailia, Egypt.
This site requires cookies in order to provide all of its functionality.